
CV joints are an important part of your car. They allow the car to make turns without jerking or feeling like something is wrong. When they start to go bad, you will start to experience a variety of symptoms. In this blog post, we will discuss the symptoms of bad CV joints and the replacement cost for both front and rear CV joints.
What Are CV Joints and What Do They Do?
CV (constant velocity) joints are an essential part of many types of vehicles. They function as a link between the transmission and axles, allowing them to transfer power while keeping the wheels in constant motion. In automobiles with front-wheel drive, they also keep the axle from turning at different speeds when cornering.
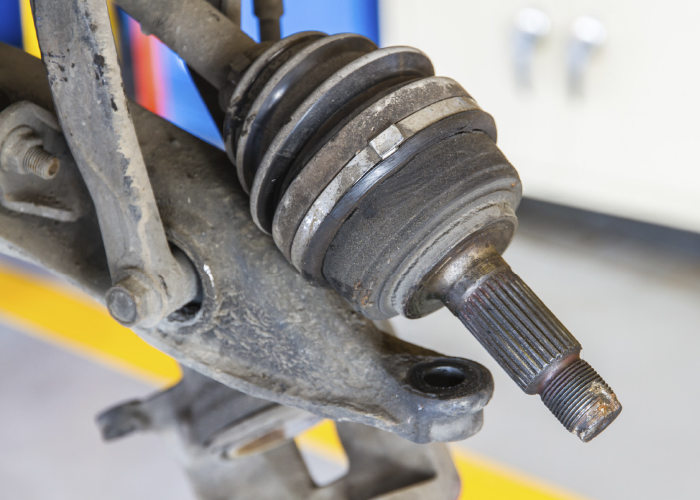
The CV joint is made up of several components. The cage is the outer shell of the joint, which houses the steel balls and races that control the motion of the shafts. Inside, there is a bearing cup and finally, two rubber boots to protect the parts from dirt, water, and other contaminants. The cups are held together with grease or a specialty lubricant to keep the joint functioning properly.
The Working of CV Joints
The CV joint works by transferring the torque from the engine to the wheels without interruption. As the vehicle turns a corner, it applies power to the inner and outer axles at different speeds. The CV joint compensates for this difference while allowing both axles to rotate at a consistent speed. A CV joint is designed to maintain constant velocity throughout the entire range of motion.
The CV joint allows two shafts connected by an axle to rotate independently of each other while still transferring power. This is important for four-wheel and all-wheel drive vehicles, where different wheels are powered by separate shafts. It also enables the vehicle to turn corners without compromising acceleration or traction.
The function of CV Joints
CV joints provide a flexible connection between the transmission and axles, allowing for free movement. When cornering, the inner and outer parts are forced at different angles, which is why they need to be able to move freely. This allows the axle shafts to turn at different rates while still transferring power. Without CV joints, you wouldn’t be able to corner without experiencing some loss in power and performance.
CV joints also help protect components from wear caused by dirt, dust, and water to compensate for the up-and-down motion of the suspension while keeping the drive shafts in constant motion. Without this, the drive shafts would not be able to turn at a constant rate and could bind, causing damage.
In summary, CV joints provide a flexible connection between the transmission and axles, allowing them to transfer power while keeping the wheels in constant motion. They also help protect components from wear caused by dirt, dust, and water and keep the drive shafts in constant motion.
What are the Causes Of Bad CV (Constant Velocity) Joints?
Constant Velocity (CV) joints are an important part of a vehicle’s suspension and drivetrain system. Unfortunately, CV joints can become damaged or worn over time due to several different causes. The common causes of damage to CV joints include:
Accidents or Poor Driving Conditions
Accidents or poor driving conditions can cause CV joints to experience excessive vibrations, which can lead to damage. In addition, uneven terrain and rough roads can put extra strain on the joints, causing them to become loose or worn over time.
Excessive exposure to water, dust, and dirt
The elements of water, dust, and dirt can all interfere with the lubrication that is needed by CV joints to operate efficiently and effectively. Over time, this exposure can lead to increased wear on the joint resulting in a need for replacement or repair.
Lack of lubrication
Without proper lubrication, the CV joint will not be able to move as freely as it should. This can cause the joint to become stuck and result in premature wear or damage. It is important to maintain correct levels of lubrication for optimal performance.
Age and Mileage
As with any automotive component, age and mileage are two of the biggest factors that can lead to wear and damage to CV joints. As vehicles get older, the CV joints become more prone to failure as they reach their maximum service life. With regular maintenance, however, these components can last longer and provide many years of reliable service.
Incorrect Installation
If CV joints are installed incorrectly, they can experience premature failure. It is important to ensure that the components are correctly aligned and secure when being installed to ensure they remain effective for a longer period.
Faulty Parts or Manufacturing Defects
Although rare, some CV joints can be prone to faulty parts or manufacturing defects. This can lead to premature failure of the joint, even with regular maintenance and care. If you suspect that your CV joint has failed due to a faulty part or manufacturing defect, it is best to contact an experienced technician for further inspection and repair.
Not Getting Regular Maintenance Checkups
Finally, regular maintenance checkups are essential for CV joints to remain in good condition. During these check-ups, technicians can inspect the joint and identify any potential problems before they become serious. By getting regular maintenance check-ups done on your vehicle, you can help ensure that your CV joints stay in top condition for many years to come.
So, to sum up, these are the common causes of bad CV joints. By avoiding these causes and getting regular maintenance checks done on your car you can help ensure that your CV joints remain in good condition for many years. Additionally, if you suspect any issues with your CV joint it is important to have the issue checked out by a professional as soon as possible.
Symptoms Of Bad CV (Constant Velocity) Joints
When the CV axle joints are in disrepair, they can cause a myriad of issues. The outer CV joint is prone to deterioration faster than its inner joint as it operates through greater angles; notwithstanding, both types may eventually become damaged and you’ll notice certain symptoms:
Vibration While Driving

Vibrations while driving can be a tell-tale sign of a damaged CV Axle which is connected to the wheels of your vehicle. As these axles are responsible for transferring power from the engine to the wheels of your car, any wear or damage that compromises their performance is likely to result in vibrations. It is important to note, however, that vibrations can be caused by a variety of issues, and so should not necessarily be taken as proof of a damaged CV Axle.
Clicking While Turning
Half shafts are responsible for allowing wheels to turn and giving them power. The rubber boot on the CV Axle Joint protects the joint which allows the wheel to turn. If the boot is damaged, this may result in noticeable changes in steering. In particular, if you hear a sudden loud clicking noise while turning your car in any direction, this could be an indication of a worn-out or blown CV joint. However, there are also other possible causes of such sounds, so it’s best to leave an official diagnosis to professional mechanics.
Knocking Sound

Another sign of a malfunctioning CV axle is a persistent knocking sound that appears suddenly while driving. Again, this may not necessarily indicate a problem with your half-shaft, but it does require immediate attention from an expert technician.
Grease Found on the Inside of Your Wheels
The boot of the CV Axle is filled with special lubricating grease that enables its smooth functioning. If the boot gets damaged somehow, then some of this lubricating grease might leak onto your wheels and tires.

This is quite difficult to detect as it is far less obvious than clicking or knocking noises coming from your vehicle; however, you can still check your tires for any signs of grease as these would confirm suspicions regarding your CV axle’s health.
Wheel Misalignment
Any misalignment of the wheels about your car’s chassis can also be an indication of a damaged CV Axle. This is usually caused by worn-out, cracked, or damaged joints which are unable to keep the axle properly aligned with the wheels. This issue usually manifests itself through a variety of different symptoms including difficulty in steering and frequent drifting when on straight roads.
Braking Difficulties
A faulty CV Axle can also cause difficulty when braking, as it prevents the engine from transferring power to the wheels efficiently. If you notice any braking issues while driving, then this could be a sign of a damaged CV axle joint.
Bouncy Driving
If you feel bumpy and bouncy while driving, it could be a sign of a faulty CV axle joint. It is possible that the damaged joint is preventing your wheels from receiving adequate power and this can lead to unpleasant ride quality.
Overall, these are some common signs of bad cv joints that should prompt you to seek professional help. It is important to note that these symptoms can also be caused by other issues, such as tire and wheel problems, so it is best to leave an official diagnosis to the experts. Doing so will ensure that your car remains in top condition and that any necessary repairs are carried out promptly.
What happens when a CV joint fails?
If the CV joint fails, it will cause a loud clicking or clunking sound when turning a corner. This is due to the loss of power transmission from the axle shafts to the drive wheels. You may also experience vibration in your vehicle as you attempt to accelerate. Depending on how extensive the damage is, some drivers may even experience difficulty turning their steering wheel. In extreme cases, the CV joint may completely fail, causing a loss of control over the vehicle and potentially leading to an accident. It is important to immediately address any signs of a failing CV joint to avoid further damage or dangerous driving conditions.
How to Diagnose a Bad CV Joint?
Before you invest in a new CV axle assembly to replace the joint, it’s wise for you to do some diagnostics as a range of issues may appear like an unfavorable CV joint. Moreover, figuring out which joint is causing the problems can be tricky. Thus, doing your research prior will save time and money!
Struggling to know which CV joint is bad? The following tips will help you diagnose the bad joint!
Perform a Visual Inspection
Check for leaks, cracks, and any damage to the CV joint by visually inspecting it. Notice if the boot is torn or damaged as this may be a sign of a bad inner or outer joint. If you see any tears, then that points to your problem.
Take a Test Drive
When it comes to determining the condition of a car’s CV joints, the best way to go about it is to take it for a test drive. By driving around, you can easily identify any noise or shaking that may be caused by a worn-out joint.
1: To check for a noisy worn outer CV joint
One way of testing for an outer CV joint that may be worn out is to put the car in reverse and then slowly turn the steering wheel in one direction before making a circle. If you hear a clicking or snapping noise, likely, an outer joint is not functioning properly.
2: To check for a noisy worn inner CV joint
To test for a worn-out inner CV joint, accelerate and then decelerate quickly while driving in reverse – if there’s a clunking sound, an inner joint may need to be replaced. To double-check, it’s also possible to hold the inner joint with two hands while turning the wheel by hand (with the car safely supported).
Check the Wheel Bearing
The wheel bearing is another element to check when diagnosing a faulty CV joint. To test it, you can use an automotive stethoscope while driving and listen to the noise with both the car stopped and going. If you find any problems, then the bearing may need to be replaced.
Check the U-Joints
Finally, if you are still uncertain about which joint is bad and all other options fail, you can also check the U-joints for any wear or damage. To do this, turn the steering wheel from side to side while listening for any noise or feeling for any vibrations. If you find any wear and tear, you will need to replace the U-joints.
By following these simple steps, you can easily diagnose a bad CV joint and take action before further damage is done! However, it’s always wise to seek professional help if the problem persists so as not to cause any further damage to the axle assembly.
How Much Does it Cost to Replace a CV Joint?
Replacing a CV joint can be a major repair job that requires special tools and knowledge. The parts themselves, which include the CV joint, will cost between $95 and $210 depending on the number of axles being replaced. If you need to hire a mechanic to do the job, you should expect to pay anywhere from $165 to $800, with double axle replacements costing twice as much as single ones.

The price may also depend on the make and model of your vehicle, as well as how difficult it is for the technician or mechanic to get the job done. In addition to replacing the CV joint itself, your auto technician or mechanic needs to conduct a general safety inspection of any other components related to it such as boots and axles. If there is grease on your tires, this could indicate that there is a leak from one of your CV boots. Additionally, if you hear any clicking sounds when turning corners, then you might also need to replace the axle altogether.
When looking into how much it costs to replace a CV joint, it’s important not just to consider the cost of getting the parts themselves but also to factor in additional expenses such as labor costs and potential additional repairs that might be necessary. Remembering these considerations will help you budget more accurately for this kind of repair job.
Are CV Joints Covered Under Warranty?
The answer to this question depends on the type of warranty you have and what is covered by it. Generally, most vehicle warranties cover the cost of repairs for any problems that are due to defects in materials or workmanship. If your CV joint is found to be defective, then it should be covered under warranty.
However, if the issue is caused by improper maintenance, lack of lubrication, or any other form of negligence, then it is likely that the warranty will not cover the cost of repairs. It is important to note that CV joints are a common source of problems with vehicles and they often require frequent inspection and maintenance to stay in good condition. Thoroughly look at your extended warranty agreement to determine if CV joints are included in the coverage.
Can a CV Joint Be Repaired Instead of Replaced?
In some cases, a CV joint can be successfully repaired instead of replaced. The repair process involves removing the old boot and cleaning out any dirt or debris that has accumulated over time. If there is corrosion present, it may need to be removed as well. Once the joint is cleaned up and inspected for wear, new grease, and a new boot can be applied. If the joint is in good condition and not worn out, it can then be reassembled and reinstalled.
However, it’s important to note that repair may not always be the best option. In many cases, the wear on a CV joint has already caused damage to the components inside and will require replacement instead. If the CV joint has been exposed to high levels of heat or stress, it may also be necessary to replace it. Additionally, if the boot is cracked or torn, a replacement is usually recommended rather than a repair.
It’s important to have a qualified mechanic assess the condition of your CV joints before attempting any repairs. This will ensure that the repairs are done correctly and that the joint is in good condition before being reinstalled. Additionally, it’s important to use high-quality parts and lubricants when performing any type of CV joint repair or replacement. This will help ensure a safe and reliable ride for years to come.

Do I need to Replace Both CV Joints or Just One?
The answer to this question depends on a variety of factors, including the condition of your CV joints, the type and amount of wear they have experienced, and their age.
If you have an older vehicle or one that has seen a lot of use, it is possible that both CV joints need to be replaced. This can also be the case if one joint is severely damaged or worn down. In some cases, it may be necessary to replace both CV joints to ensure that your vehicle performs optimally and safely.
On the other hand, if your vehicle has relatively new CV joints and limited wear, you may only need to replace one of them to restore your car’s performance. When it comes to replacing CV joints, it is best to consult with a professional mechanic or auto shop that has experience in this area of work. They can inspect the condition of the joints and let you know what needs to be done so that you can make an informed decision about how to proceed.
Do I Need an Alignment After Replacing CV Joints?
In most cases, you will need to have an alignment done after replacing your CV joints. This is because the process of replacing your CV joints involves removing or otherwise loosening other components to access them. These components, when replaced and tightened back down, can throw off the alignment of the wheels. Having a professional do an alignment afterward ensures that the wheels are pointed in the right direction and that your vehicle is operating as efficiently as possible.
It’s also important to remember that when replacing CV joints, you may need to replace other components as well, such as control arms or tie rods. If these components have been replaced or adjusted during the repair, then an alignment will be necessary to ensure that the new setup is correct and balanced.
An alignment should be done any time you replace suspension components, as this ensures that your vehicle’s steering system is calibrated correctly and will help to minimize tire wear. It’s a good idea to have an alignment performed after replacing CV joints, as improper alignment can lead to accelerated tire wear and poor handling. Having an alignment performed after replacing CV joints will also ensure that the wheels are pointed in the right direction and that your vehicle is operating as efficiently as possible.
Can I Replace My CV Joints Myself?
Replacing CV joints ranks a 2.5 on the difficulty scale, with one being an effortless cabin air filter change and five standing for a full engine overhaul. Don’t be intimidated! You can watch instructional YouTube videos based on your make and model to help you succeed in this task!
Although you must have a lift and total toolkit to make this job practical, it is highly recommended that the car be inspected by an alignment shop afterward.
Maintenance Tips on Caring for Your Car’s Suspension System?
Regularly checking for signs of wear and tear in the suspension system of your car is essential to ensure that your car is safe on the road. Here are some tips to help you maintain your car’s suspension system:
Check Your Shock Absorbers
Shock absorbers are an essential part of the suspension system and they will eventually wear out over time. Checking your shocks is easy, just look for signs of leaking oil or corrosion on the shock body and make sure it is not sagging. If you notice any issues with your shocks, replace them as soon as possible.
Inspect The Springs
Springs are also a part of the suspension system and they need to be inspected regularly. Look for signs of rust or corrosion, especially on the bottom of the spring where it touches the road. If you notice any issues with your springs, replace them immediately to ensure that your car can handle bumps in the road properly.
Check The Suspension Links
Most cars have four main suspension links that help control the movement of the wheels. Make sure to check these links periodically and look for any signs of wear or tear such as loose nuts and bolts, cracked rubber bushings, or broken ball joints. If you find any issues with your suspension links, have them replaced as soon as possible.
Perform Regular Wheel Alignments
Proper wheel alignment is essential for keeping your suspension system in good condition and it should be done at least once a year or every 5,000 miles, whichever comes first. During an alignment, all four wheels will be adjusted to make sure they’re facing the right direction and that the tires are properly balanced.
Change Your Oil Regularly
Oil is necessary for lubricating the suspension components, so changing it regularly (at least every 3,000 miles) will help keep your suspension system running smoothly and free of debris. In addition to oil changes, you may also want to consider using synthetic oil which offers better protection against wear and tear.
By following these simple tips, you can ensure that your car’s suspension system remains on top. With proper care and regular service, you can maximize the performance of your vehicle and enjoy a safe, enjoyable ride every single time.
Wrapping Up
The Constant Velocity (CV) joint is a crucial part of your car’s suspension system, allowing the wheels to rotate as the car turns. Unfortunately, CV joints don’t last forever and will eventually need to be replaced. But how do you know when it’s time to replace them? In this blog post, we’ll answer all of your questions about CV joints, from what they are and what they do to the symptoms of a bad CV joint and how much it costs to replace one. By the end, you’ll have a better understanding of this important car component and whether or not yours needs attention.